Summary
- Display your flight track in 2D-track, 3D-track, or cockpit-view
- Analyze the entire flight, or selected maneuvers
- Analyze flight graphs
- Debrief the route’s accuracy
- An interface optimized for mobile devices
Users debriefing on a phone will have access to all CloudAhoy features in a format that has been optimized for touch controls. By default, all flights will load with a single view configured to be a 3D Track View, but can be changed to be a 2D Track View, 3D Cockpit View, or Segment Information View.
The Debrief Tab
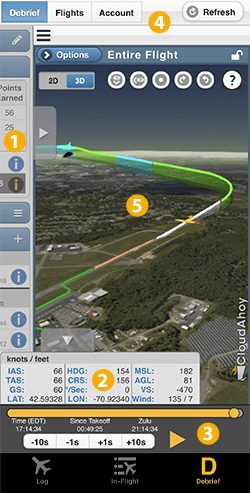
The mobile device layout has several components to help you debrief.
- The Debrief Tools Panel (collapsed by default)
- The Data Panel
- The Timeline
- The Toolbar
- The Debrief Area
The Debrief Tools Panel
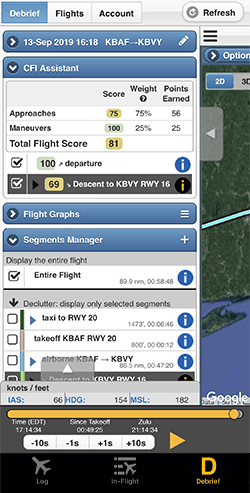
The Debrief Tools Panel will be collapsed by default and any time you are debriefing a flight. Tap the arrow on the left side of your screen to expand it.
Each of the tools in this panel has a blue heading and can be opened or closed by tapping the blue area.
- Flight information: information includes the pilot names, the tail number, and the runways used for takeoff and landing plus the exact wheels-up and wheels-down time.
- CFI Assistant: a list of all scored maneuvers from the flight
- Flight Graphs: displays graphs of selected entities like airspeed and altitude. More…
- Flight Segments: displays the segments of your flights. Has tools for adding custom segments. More…
- Intended Flight Path: a tool for drawing the intended flight path, to compare against the actual flight flown. More…
- Instrument Procedures: a tool for analyzing instrument approach procedures. More…
- Nav: a tool for debriefing the aircraft’s location relative to navaids. More…
The Data Panel
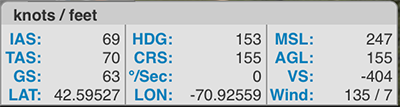
The current flight’s altitude, airspeed, and heading are displayed in a panel just above the play control. Additional parameters, such as vertical speed and wind, can be displayed and hidden by clicking the tab at the top of the panel. The units in which the values are displayed can be selected from the Account tab.
The Timeline

Use the timeline to move back and forth in time. The current time is shown under the slider in
- Local time (using the current time zone)
- Time since takeoff. Time prior to the first takeoff, such as when taxing to the runway, is displayed as negative.
- UTC / Zulu time.
To advance the timeline…
- Using the slider to quickly get get to any time along the flight.
- Tap the +- 1s/10s buttons for finer control
- Use the
 control to run animation at 1x speed up to 10x speed
You can also select a segment from CFI Assistant or Segments Manager. Selecting a segment in this way will advance the timeline to the start of the segment. Finally you can tap and scrub any segment information window to advance the timeline through the active maneuver.
Managing Views
The CloudAhoy interface allows you to choose between any view type. Views can be decluttered so that they shows one, many, or no segments of the flight. See Decluttering for more information.
Each view can be configured to display one of four types:
- 2D Track
- 3D Track
- 3D Cockpit with HUD
- Segment Information
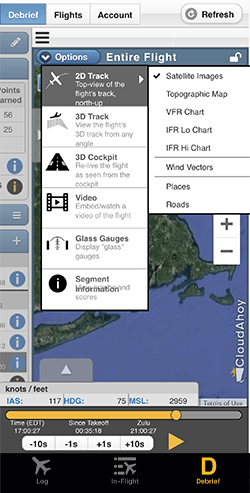
Select the type of view you want through the options menu. Through this menu you can also select the type of map that you want, including the ability to overlay VFR and IFR sectionals.
Moving the Camera
Using 3D Track
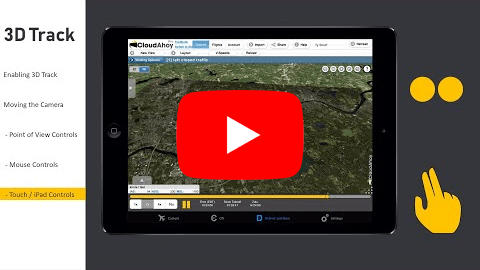
3D Track
The camera in 3D Track View offers pilots a powerful way to visually debrief their flights. By panning, rotating, and zooming into individual segments it’s easy to visualize errors in both tracking and altitude. The camera can be manipulated using two fingers to perform a number of standard gestures.
- Panning is accomplished by tapping on the screen and moving your finger up, down, left, and right
- Zooming can be performed by executing two finger pinch of stretch
- Rotate the camera by using two fingers and moving them in a clockwise or counter clockwise fashion
2D Track
Looking at your flight path in 2D offers a different perspective compared to its 3D counterpart. Like 3D Track, the 2D Track View controls work just like any other mapping app.
- Pan the camera by by tapping on the screen and and moving your finger up, down, left, and right
- Zoom in and out by using pinch and stretch gestures