Summary
Tool for helping debrief the planned vs. actual flight path.
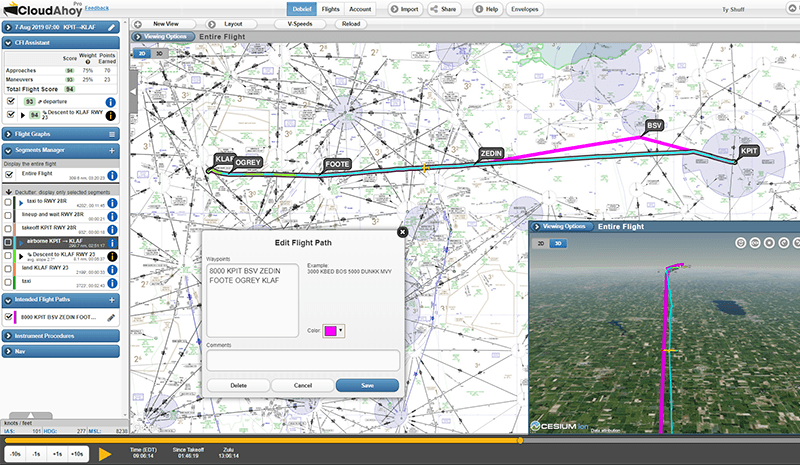
The Intended Flight feature allows you to draw the planned path (or paths) in 2D or 3D, and compare with the flight actually flown.
The screenshot above shows the cleared flight path of a cross country flight from KPIT to KLAF. Notice the shortcut that was given by avoiding the BSV VOR altogether.
from ForeFlight
When you import a flight from ForeFlight, we also import your flight path. See our blog post for more information.
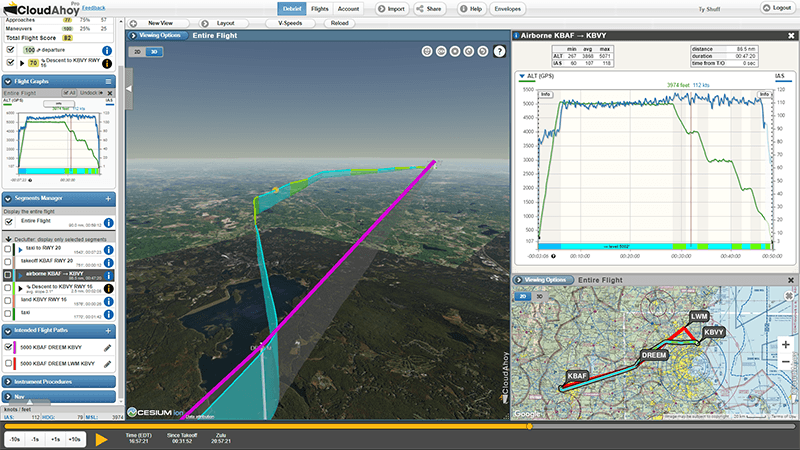
The screenshot below contains a local flight. The magenta path on the main view shows what the pilots were cleared to fly, this time on a VFR chart. A second window displays a different path: that which the pilots had filed for the flight (rendered in red). This illustrates the capability of CloudAhoy to show or hide different intended flight paths in different views.
To create a path, click the “+” sign on the Intended Flight Paths banner, and the path editor will open. Type a list of waypoints and optional altitudes in the box, then click “Save”. The waypoints and altitudes are separated by spaces. You can type
- Any US fix name (example: LOBBY),
- VORs (example: BOS),
- Airports (example: KBED)
- Coordinates (example: 36.193N/71.109W). You can precede the coordinates with a name followed by an equals sign (example: STACKS=40.92N/73.35W) in order to display the name on the chart rather than the coordinates.
- Numbers such as 5000 denote altitude, and are optional.
You can have any number of paths per flight, and assign each a color of your choice. You can edit paths, and you can delete them.
Showing or hiding a flight path is done by checking or unchecking the path’s visibility checkbox. Only the active view will have the path shown or hidden, allowing you to show different paths in different views.
Further Reading