Summary
- Use declutter to focus on one specific loop in the pattern
- Analyze the loop: wind correction, altitude and airspeed, and cross-wind landing
This tutorial demonstrates one way of debriefing traffic patterns.
The particular flight we use for demonstration was logged on Stratus 2, and imported from ForeFlight into CloudAhoy. The AHRS information from Stratus comes in handy, as we will see at step 7, below.
Credit: the flight was flown by student pilot Kim-Son Nguyen with CFI Darryl Kalthof. Thank you guys!
1. Open the flight’s debrief
- Open the flight – it will be initially displayed using your default layout.
- If not already selected, load the 2D Track view using the Layouts button.
- Examine the segment list on the left.
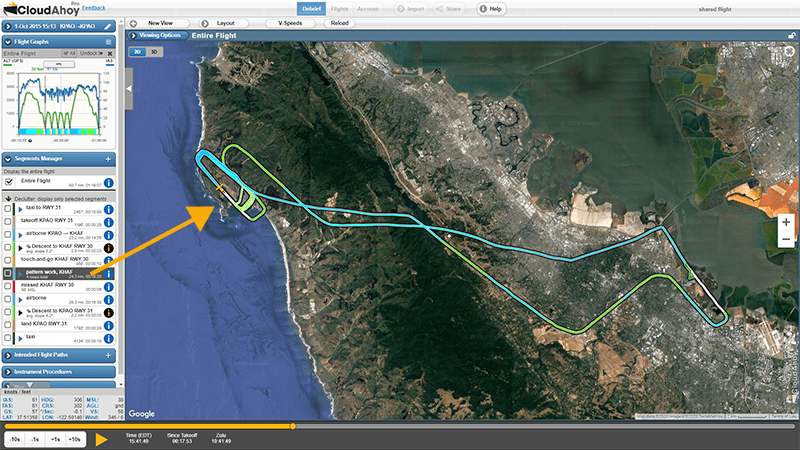
In this specific flight, Kim-Son flew out of KPAO (where the aircraft symbol is initially), practiced traffic work at KHAF, then returned to KPAO.
This flight has four closed traffic patterns. CloudAhoy identified them collectively as “pattern work, KHAF” segment, which includes “4 loops total”.
2. Zoom on the traffic patterns
- Zoom: by clicking the traffic pattern segment in the segment list
- If needed, zoom manually
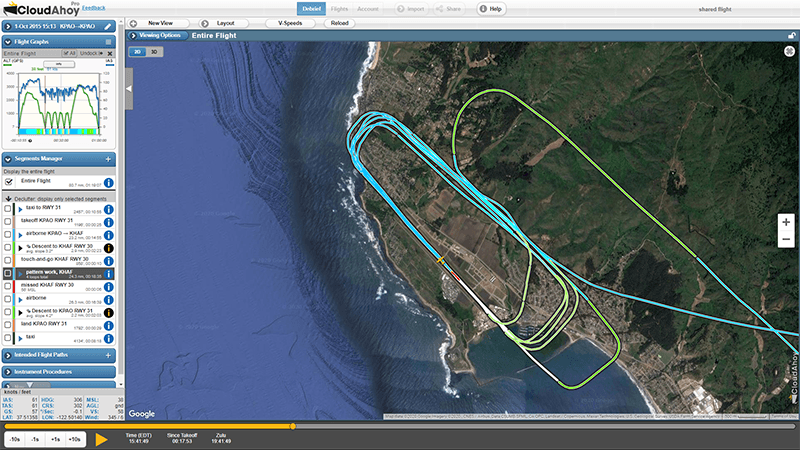
We clicked the “pattern work, KHAF” segment. CloudAhoy zoomed on all the patterns and also set the time to the beginning of that segment – here the aircraft symbol is shown after the first touch and go.
3. Explore the patterns in 3D
- Click the 2D / 3D Toggle Switch located in the upper left corner of the debrief window
- Set a convenient viewing angle (the “?” icon on the upper-right corner provides tips for doing it)
- Open the hierarchical segment to show the individual traffic patterns
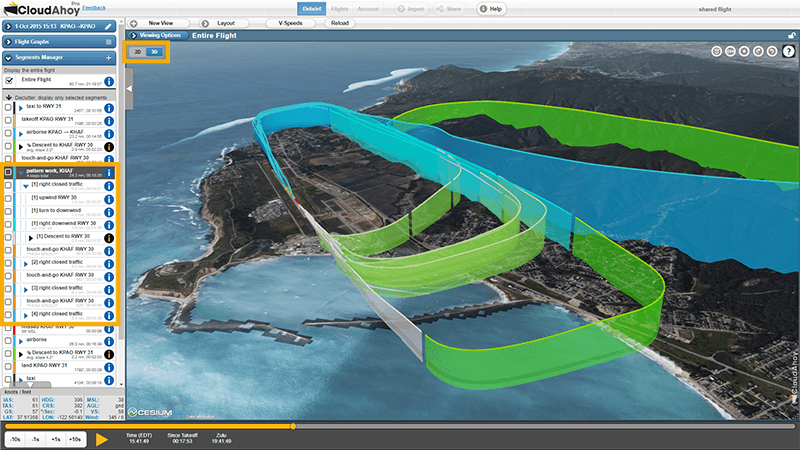
We clicked the blue triangle in the “pattern work, KHAF” segment, to open it. It has sub-segments under it. There are four pairs of “right closed traffic” and “touch-and-go KHAF RWY 30”.
3D tracks like this may be familiar to you, for example if you have exported data from ForeFlight to the Google Earth app. At this point the track is pretty cluttered and it is still hard to figure out what’s going on.
5. Declutter, focus on one loop
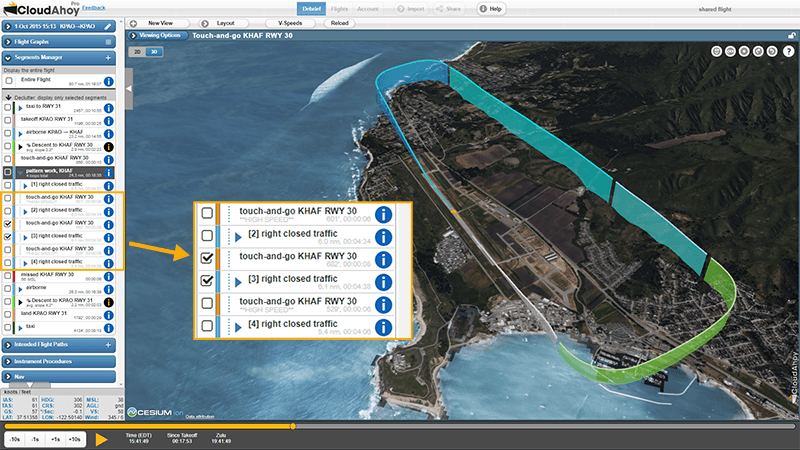
- Show the single pattern loop by clicking its declutter checkbox

- Check the declutter checkbox for the “touch-and-go KHAF RWY 30” segment immediately preceding the single pattern loop to make the touch-and-go visible as well
6. Declutter with Maneuver Analysis
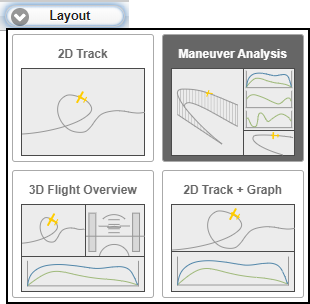
The Maneuver Analysis layout provides a view of all selected segments, a segment information window, and an overview of the whole flight.
- In the layout menu, select Maneuver Analysis.
- Select the lap in the pattern that has been decluttered and reposition the 3D View.
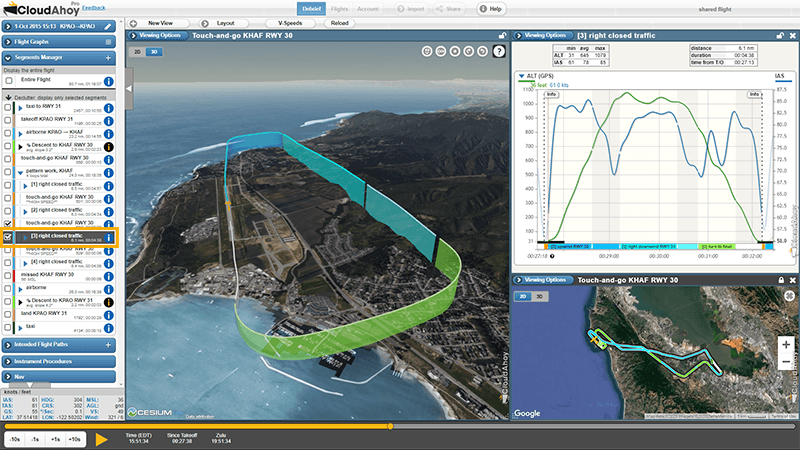
We displayed the second “right closed traffic” and the preceding “touch-and-go KHAF RWY 30”.
We now have one traffic pattern in the main view display, and all the patterns in the smaller “context” view. Selecting a different loop can be done by clicking the declutter checkboxes while the main view is active to change the visibility of segments.
7. Debrief wind correction on the downwind
□ Check how rectangular the pattern was.
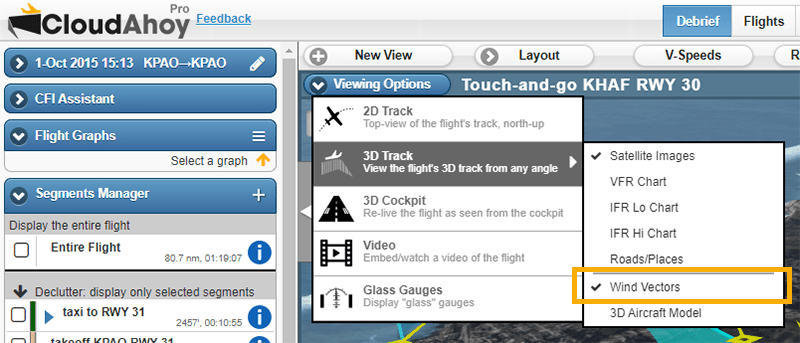
□ Select Wind Vectors from Viewing Options of the main view.
Observations:
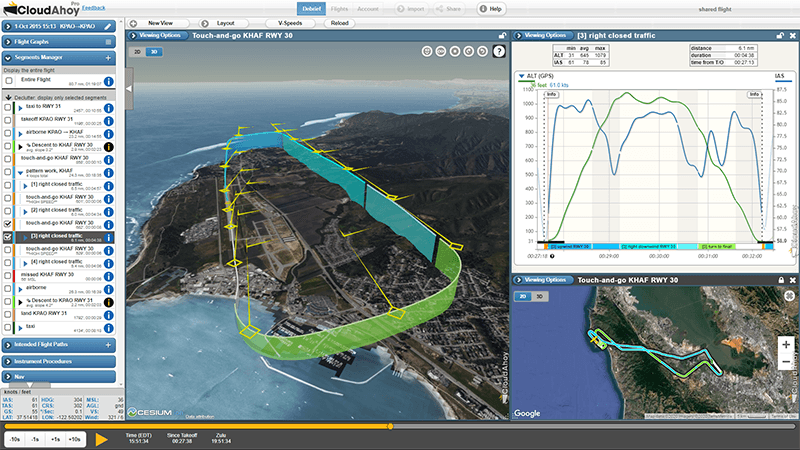
This traffic pattern looks a bit trapezoidal: the downwind leg is not parallel to the runway.
Displaying the wind vectors shows why: CloudAhoy shows 6 knots cross wind (at 235°) which the pilot did not correct for. This is a very common mistake that CloudAhoy debriefs are so effective at demonstrating: the pilot flew a heading which was parallel to the runway, and should have instead crabbed into the wind.
Another way to demonstrate this is with cockpit view animation.
8. Debrief airspeed and altitude during the pattern
- If it isn’t already, select the pattern you want to debrief
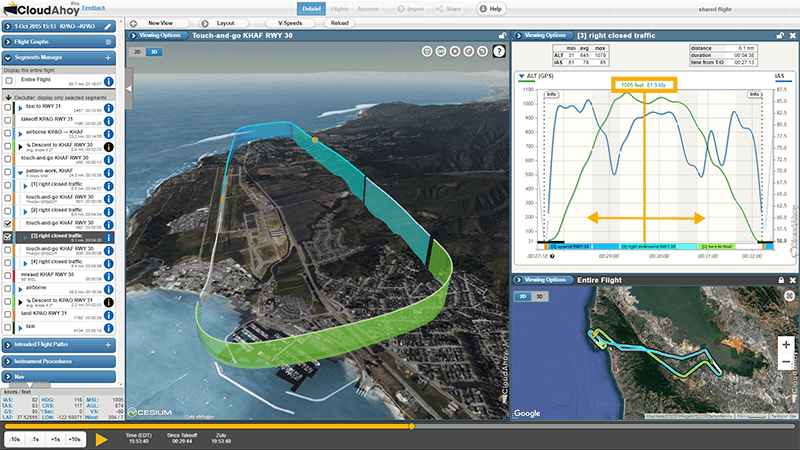
- Note the Segment Information Pane in the upper right hand corner
- Check the airspeed and altitude values by scrubbing the graph
- Verify Vy during climb
- Verify consistent speed and altitude on the downwind
- Verify a stabilized approach.
CloudAhoy color-codes each leg of the traffic pattern, in both the track display and the graph, making it easy to correlate the graph with the track. Here the upwind is in medium blue and the final in white.
Another way to correlate the graph with the track is to drag the crosshair on the graph: this will change the plane’s position on the 3D-track display.
Observations:
- The airspeed during the upwind leg was higher than Vy. It dropped on the crosswind leg.
- The airspeed was pretty consistent on the downwind, fluctuating +- 5 knots.
- The downwind’s altitude started at 1000′ and reached 1100′.
- Airspeed grew to 88 knots during the right base, as the aircraft was losing altitude.
- The Final’s speed started at 85 knots, then was maintained at 77 knots for most of the descent.
9. Debriefing approach and landing
- Check the base leg for overshoot, check the final (white) for straight ground track
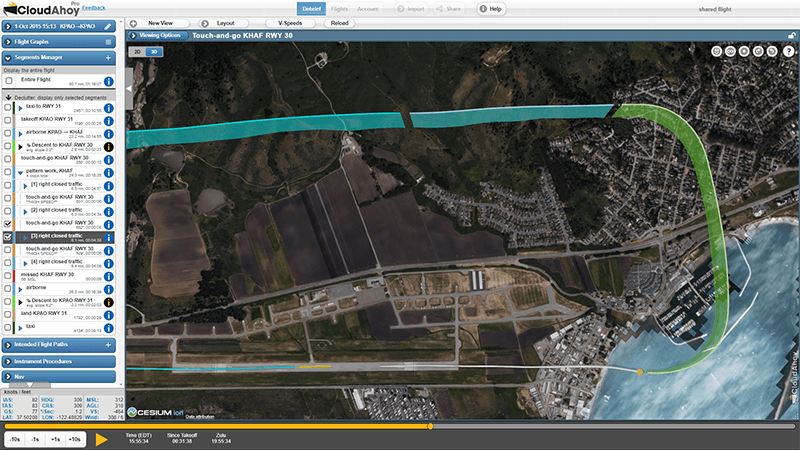
- Inspect a side-view of the 3D-track’s Final segment
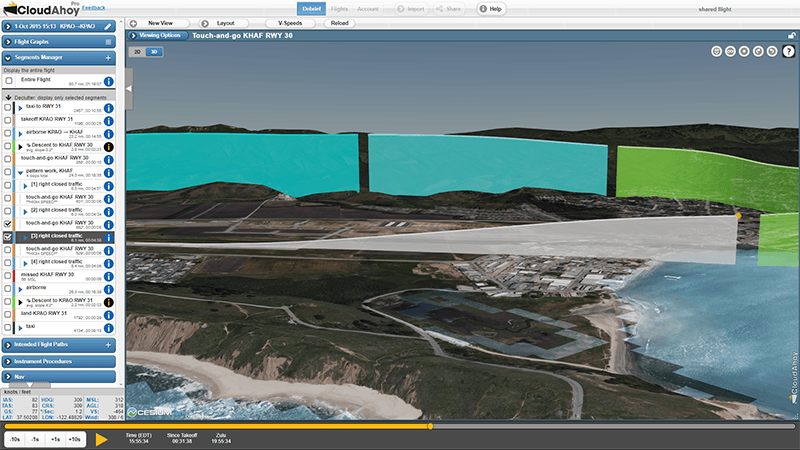
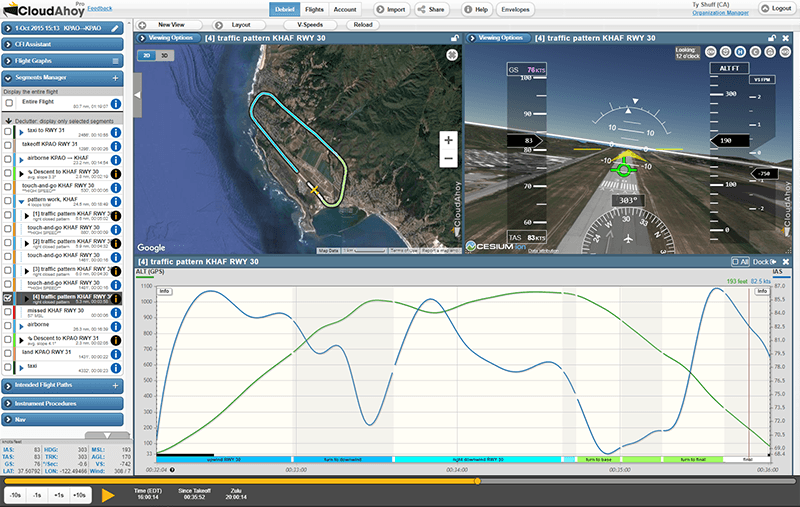
- If AHRS is available, check 3D-cockpit view for proper sideslip, and flare attitude
Notes:
- As mentioned, this flight was imported into CloudAhoy from Stratus 2 (via ForeFlight), and therefore includes AHRS information. This helps in displaying a realistic depiction of the sideslip on the Final.
- We continued to declutter: we opened the “right closed traffic” segment, and selected only the “turn to final” and “final KHAF RWY 30” segments.
- We also opened the segment info window for the final segment by clicking the segment’s
 icon. Note that the black & yellow combination indicates that this segment is part of an approach to landing.
 - Notice the crosshair on the segment info display for the final approach segment, moving in sync with the aircraft symbol on the 3D-track, and the cockpit view. Also notice that the segment info shows the average slope of the final both numerically (3.8 deg.) and as the dotted green line. See the Flight Segments article for more information about the data displayed in the segment info window.
- Note the color coding selected by CloudAhoy: light blue for the right base, white for the final, and orange for the touch-and-go.
Observations:
- About 10 seconds into the animation, the pilot started the sideslip to correct for the 6 knots cross wind from the left.
- The sideslip worked very well all the way to the flare.
- Touchdown was at 59 knots.
- The aircraft stayed on the runway for 9 seconds before rotation, and the pilot had a good control of the aircraft during that time.