Summary
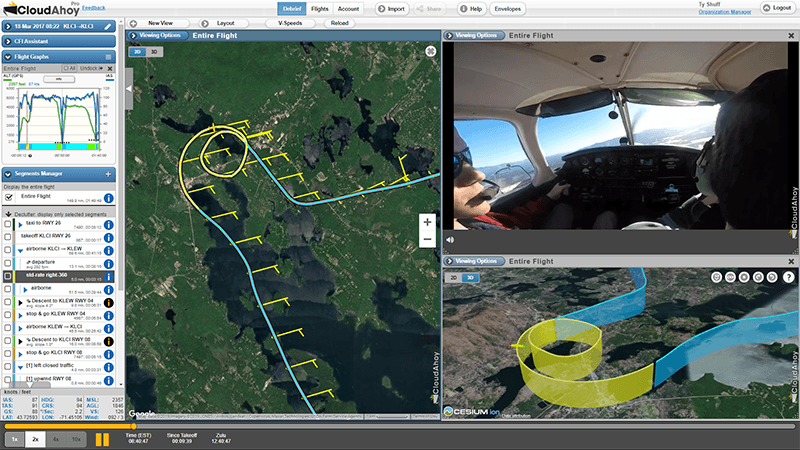
- You can embed one or two videos of your flight in a CloudAhoy’s debrief
- Play CloudAhoy animation in sync with the videos.
5-minutes on…
Debriefing with Video
Debriefing with Video
Three steps to embed a video in CloudAhoy’s debrief:
Step 1: Upload the raw video to YouTube. It has to be raw, unedited. For privacy, we recommend setting its mode to “unlisted”.
Large YouTube files
To upload files larger than 15 minutes to YouTube, you need to “verify” the account. See this from Google.Step 2: Add the video to your Flight
- Debrief the flight in CloudAhoy.
- Create a new view by clicking

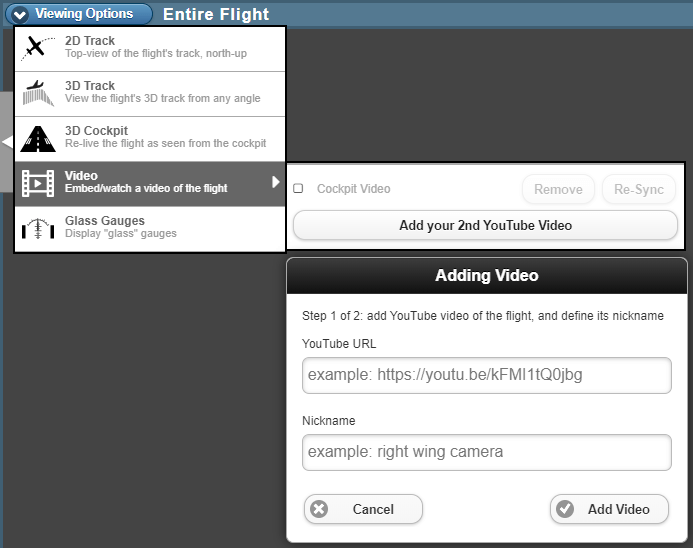
- Select Video from the Viewing Options menu, click Add your YouTube video,
- Fill out the form: URL and nickname. Then click Add Video.
Step 3: Sync the video with CloudAhoy’s timeline. (The video at the top of this article demonstrates the process)
- Move either CloudAhoy’s timeline or the video’s, such that both show the same event,
- Click Set Sync Point. Now the video and CloudAhoy are in sync. See sync tips below. The sync process has to be performed only once. CloudAhoy will remember it the next time you debrief the flight, as well as when the flight is shared with someone.
Glass
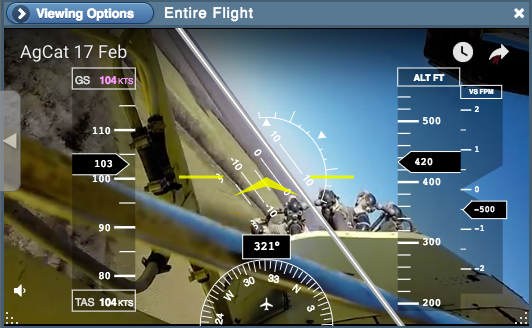
You can select the Glass Gauges option (from the Viewing Options) for a HUD-like display, see the screenshot at the bottom.To add a second video, open a new view and select Add your 2nd YouTube Video from the view’s Viewing Options.
360 Video
CloudAhoy supports 360 videos, and you may interact with them within the debrief. 360 videos are linked and synchronized in the same way as normal videos.
Notes about the synchronization process
After you master it, syncing a video should take only a few seconds. There are many ways of doing it – here is one:
- Open three views: 2D-track, 3D cockpit and video, as seen in the screenshot below (courtesy of Rob Waring).
- Click the takeoff segment. The 3D cockpit view shows the runway at the time of the beginning of the takeoff roll. Likewise the 2D track (which you can zoom into).
- Move the video time using the video controls. Using the video’s “>” and “<” buttons, and the timeline’s +1sec and -1sec, for fine control. When the video view shows a similar picture as the 3D-cockpit, click Set Sync Point.
- Advance the timeline in 1 sec increments, using the +1sec or -1sec buttons. Make sure things are synced. If needed, click Re-Sync (from Viewing Options), set the timeline one second forward or backwards, then Set Sync Point again.
With experience, this should not take more than 30 seconds.
The above assumes that the video camera is pointing at the nose of the aircraft. If not (for example, if you mounted it on the wing, facing the cockpit), you can change the cockpit’s view viewing angle to match the camera’s.
Using the takeoff roll for sync work well, but you may find it easier to use another point in the flight, for example, the moment of touchdown.
Volume control
You can adjust the audio level using the volume control icon, on the lower-left. This is especially useful when embedding two videos, thus allowing you to balance the two audio channels. For example, you might want to leave the intercom audio from one video at full volume, while attenuating the ambient sound from another video.
Troubleshooting
“Playback on other websites has been disabled by the video owner”
If you see the following when attempting to add or view a YouTube video embedded in a CloudAhoy debrief:

you need to update the permissions of the video to allow embedding:
- Go to your YouTube Video Manager.
- Go to the video you want to turn on embedding for and click Edit.
- Under the video, click Advanced settings.
- Under “Distribution Options,” check the Allow embedding checkbox.
- Click Save changes.
Once the permissions have been changed in YouTube, closing and re-opening the video view in CloudAhoy should make the video available.
Further Reading